Selling price groups allow you to add different prices for a product.
- Sell at different prices: wholesale/retail
- Different prices for different locations
Adding Selling Price Groups: #
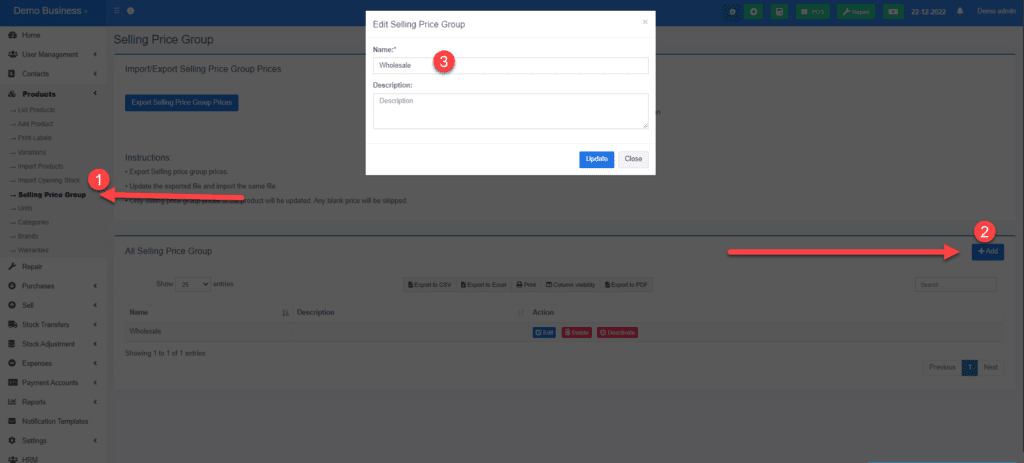
- Go to products -> Selling Price Group Selling Price Group
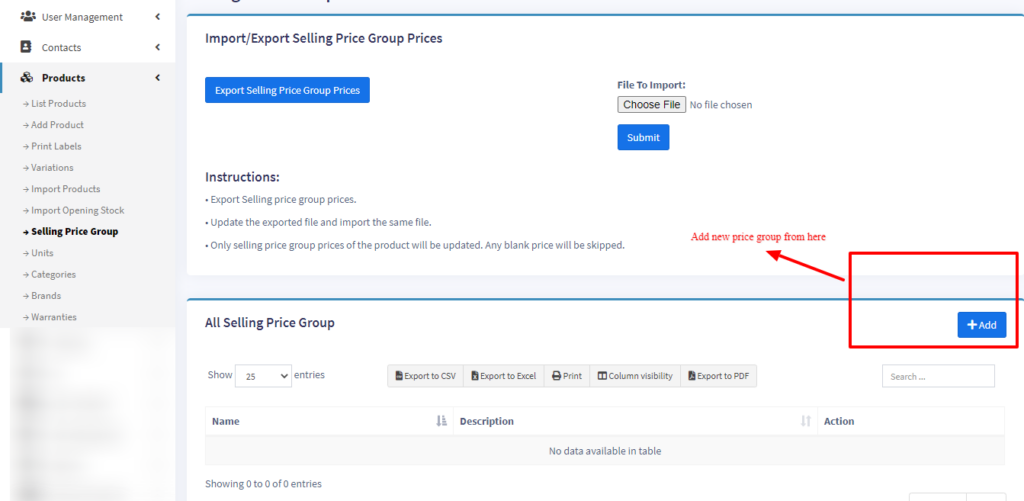
- Click on the “Add” button to add a new price group. For example Retail price or whole sale price Bulk Purchase price Location 1 price etc as per your wish.
- You can view a list of selling prices in the “Selling Price Group” screen.
- In Add/Edit product screen at the bottom, you will find the button “Save & Add Selling-price-group price”. Click on that button. Note: this button will not be visible if there are no selling price groups.
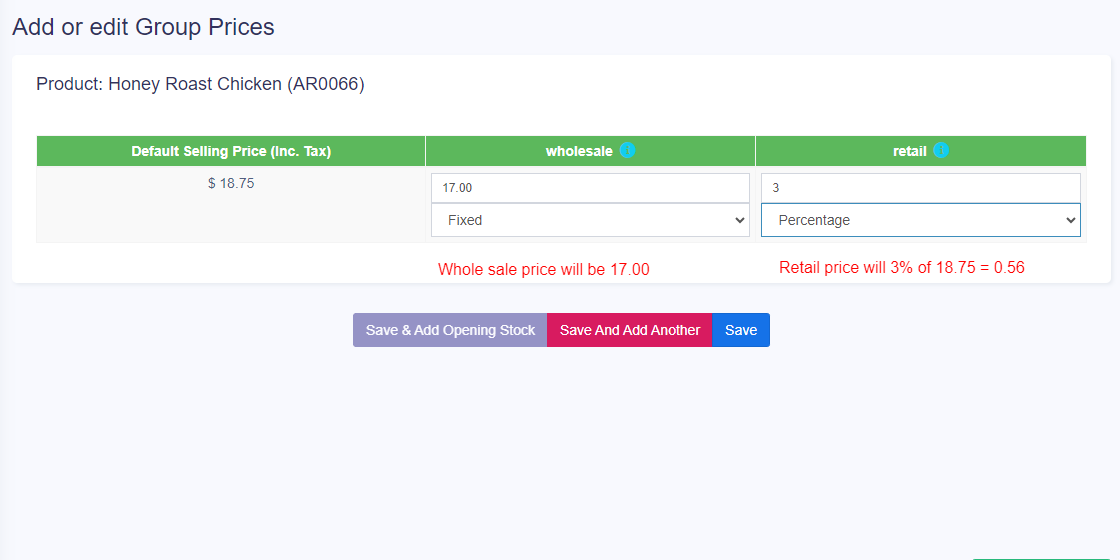
- In the next screen, you will see the list of the product name (if variable product then all variations), the default price & the selling price groups price. Enter the prices for it.
- Click on Save.
Adding Selling Price as either Fixed or Percentage: #
The selling price can be given as a whole number (fixed) or in percentage.
Fixed: The value given will be the selling price for that group.
Percentage: The value given will be taken as a percentage, and that percentage of the actual selling price will be taken as the selling price for that group.
Adding price for different price groups: #
How to Update Selling Price Group Prices in Bulk
If you want to change the prices of multiple products in a selling price group, you can do it easily by using the Excel file export and import feature. Here are the steps to follow:
1. Go to Products -> Selling Price Group.
2. Click on the “Export Selling Price Group Prices” button. This will download an Excel file with the current prices of all the products in the selling price group.
3. Open the downloaded file and edit the prices of the products as you wish. You can change the prices of any product in any currency. Note that only the prices will be updated, not the SKU or name of the product. Also, any blank price will be skipped and not changed.
4. Save the file and go back to Products -> Selling Price Group.
5. Click on the “Import Selling Price Group Prices” button and select the file you just edited. This will upload the file and update the prices of the products in the selling price group.
6. You can check the updated prices by clicking on the “View Selling Price Group Prices” button.
That’s it! You have successfully updated the selling price group prices in bulk using Excel. This feature can save you a lot of time and effort when you need to change the prices of many products at once.
Exporting & Importing selling price group: #
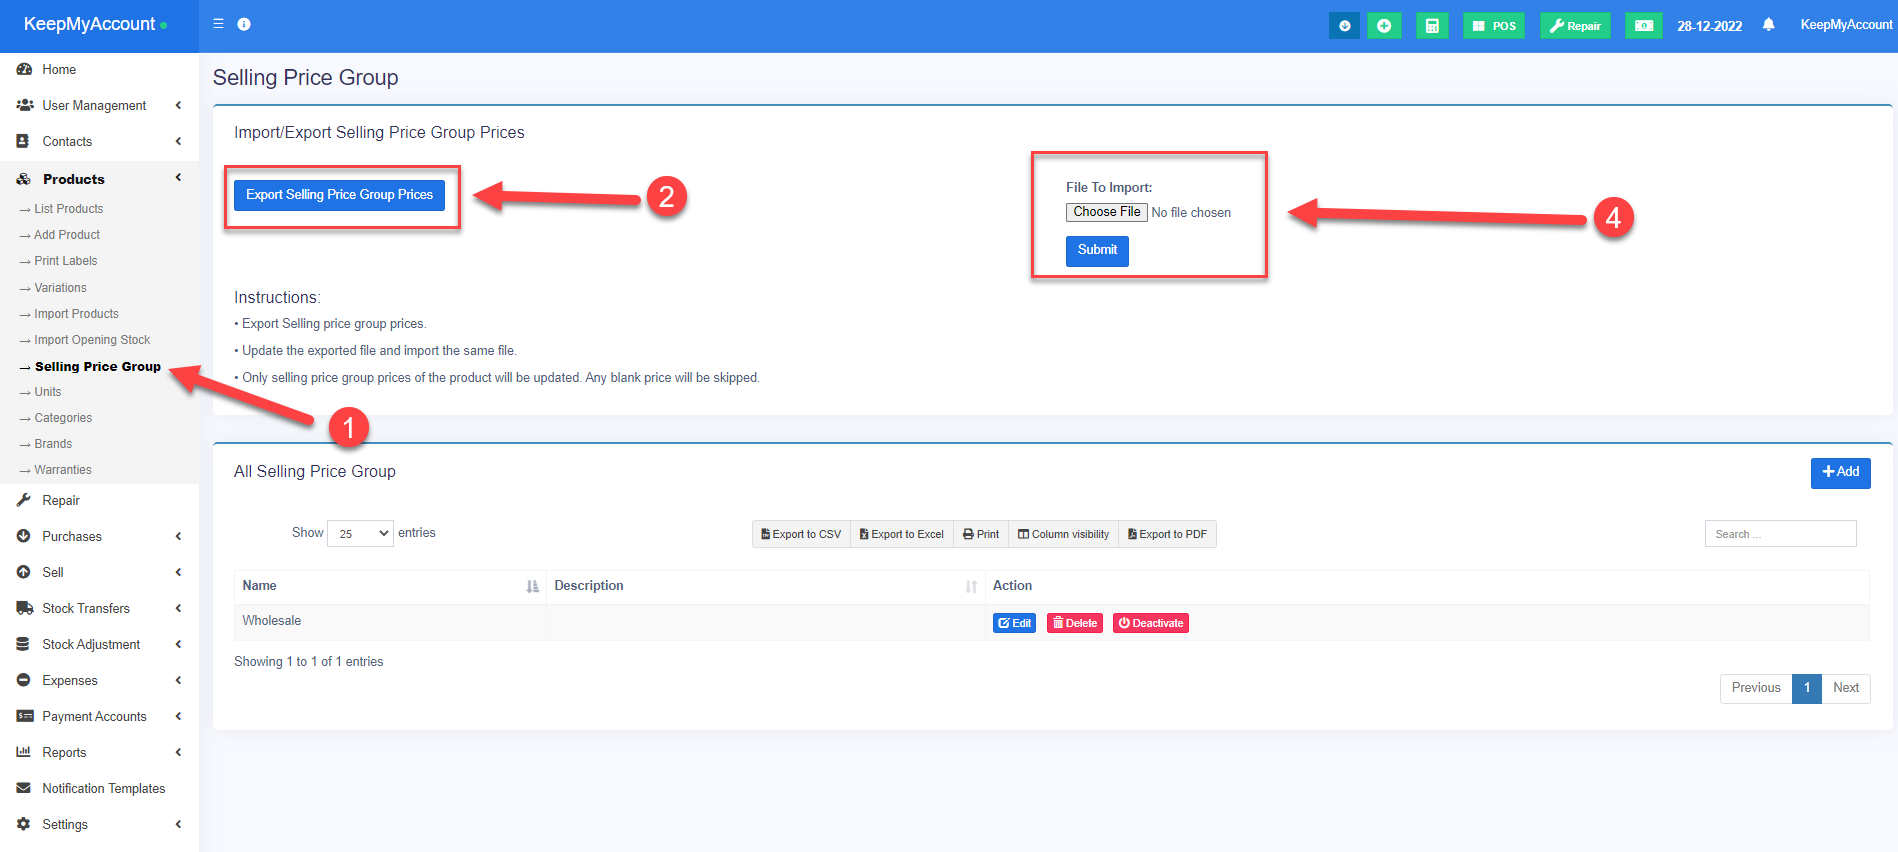
- Go to Products -> Selling Price Group.
- First, download the Excel file with the selling price group by clicking on the “Export Selling Price Group Prices” button.
- In the downloaded file change the price of products.
- Only selling price group prices of the product will be updated, not the SKU or name.
- Any blank price will be skipped.
- Then import the file.
Selling at a particular price group: #
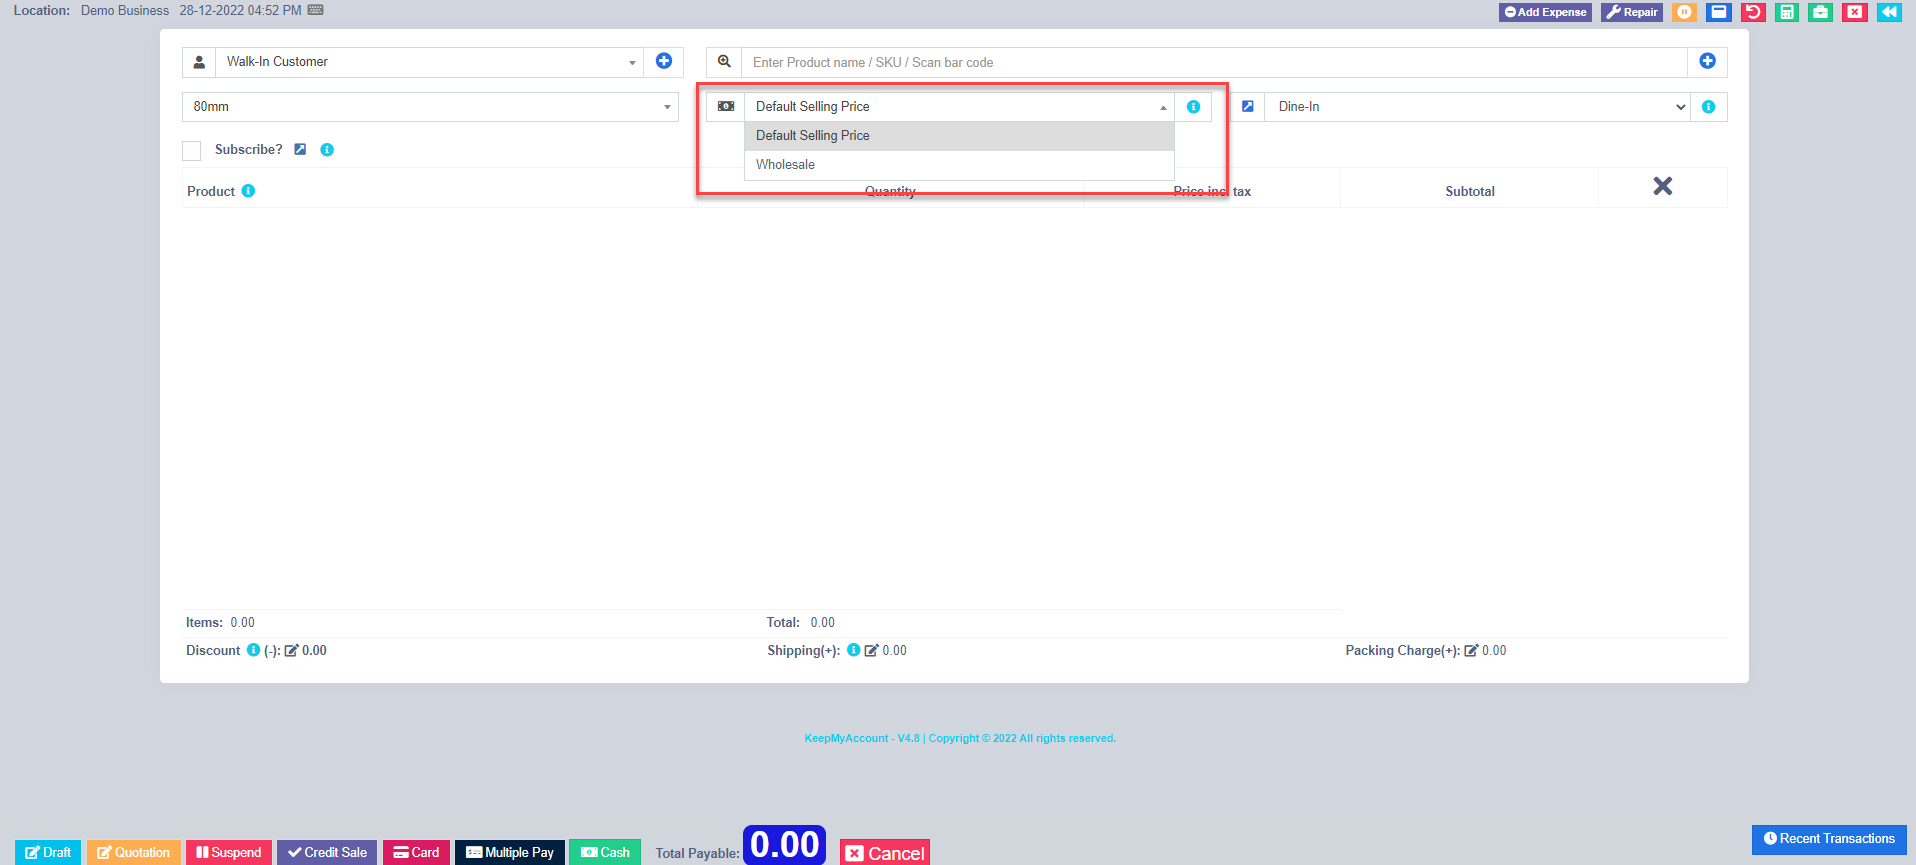
- Go to POS.
- At the top, you will see the list of selling price groups. Select the one as per your requirement.
Note: This will not be visible if there are no selling price groups or if a user is assigned only one particular price group only. - Select the price group & the selling prices for the product will be as per the price group.
- Note: Before selecting the product you need to select the first selling Group.
Assigning a user to a particular price group: #
- Sometimes you may want to assign a particular or few selected price group to a user. In that case, create a role with the desired permission & price group assigned.
- Goto User Management –> Roles –> Edit the Role and check the below screenshot
- You must assign at least one price group for a role if that role has permission to sell.

Assigning a customer to a particular price group: #
- Customers can’t be directly assigned to the selling price group.
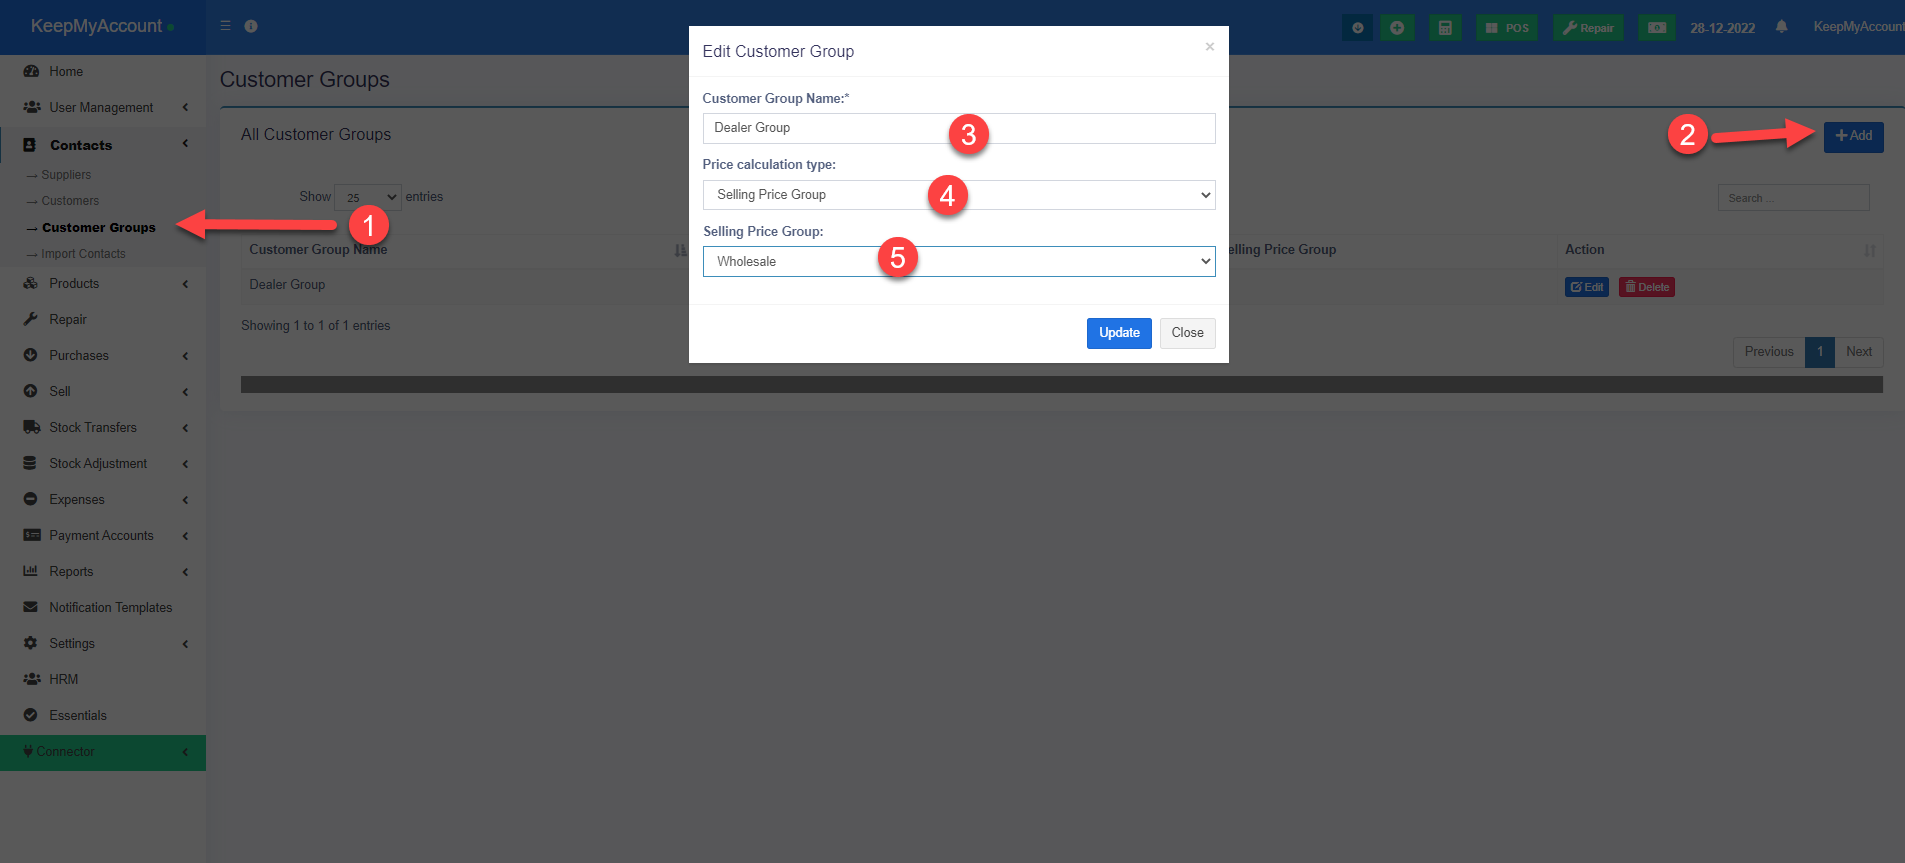
- You must assign the price group to the customer group that has the customer.
- Go to Contacts–>Customer Groups–>
- Click Add Button
- Enter Group Name
- To assign to a selling price group, you need to select the selling price group or choose the percentage option so that when you sell, the percentage discount is calculated automatically.
- Type the percentage amount if you selected percentage or the selling price group if you selected selling price group
Assigning a price group to a Business Location #
- Helps sell the same product at different prices in different business locations.
-
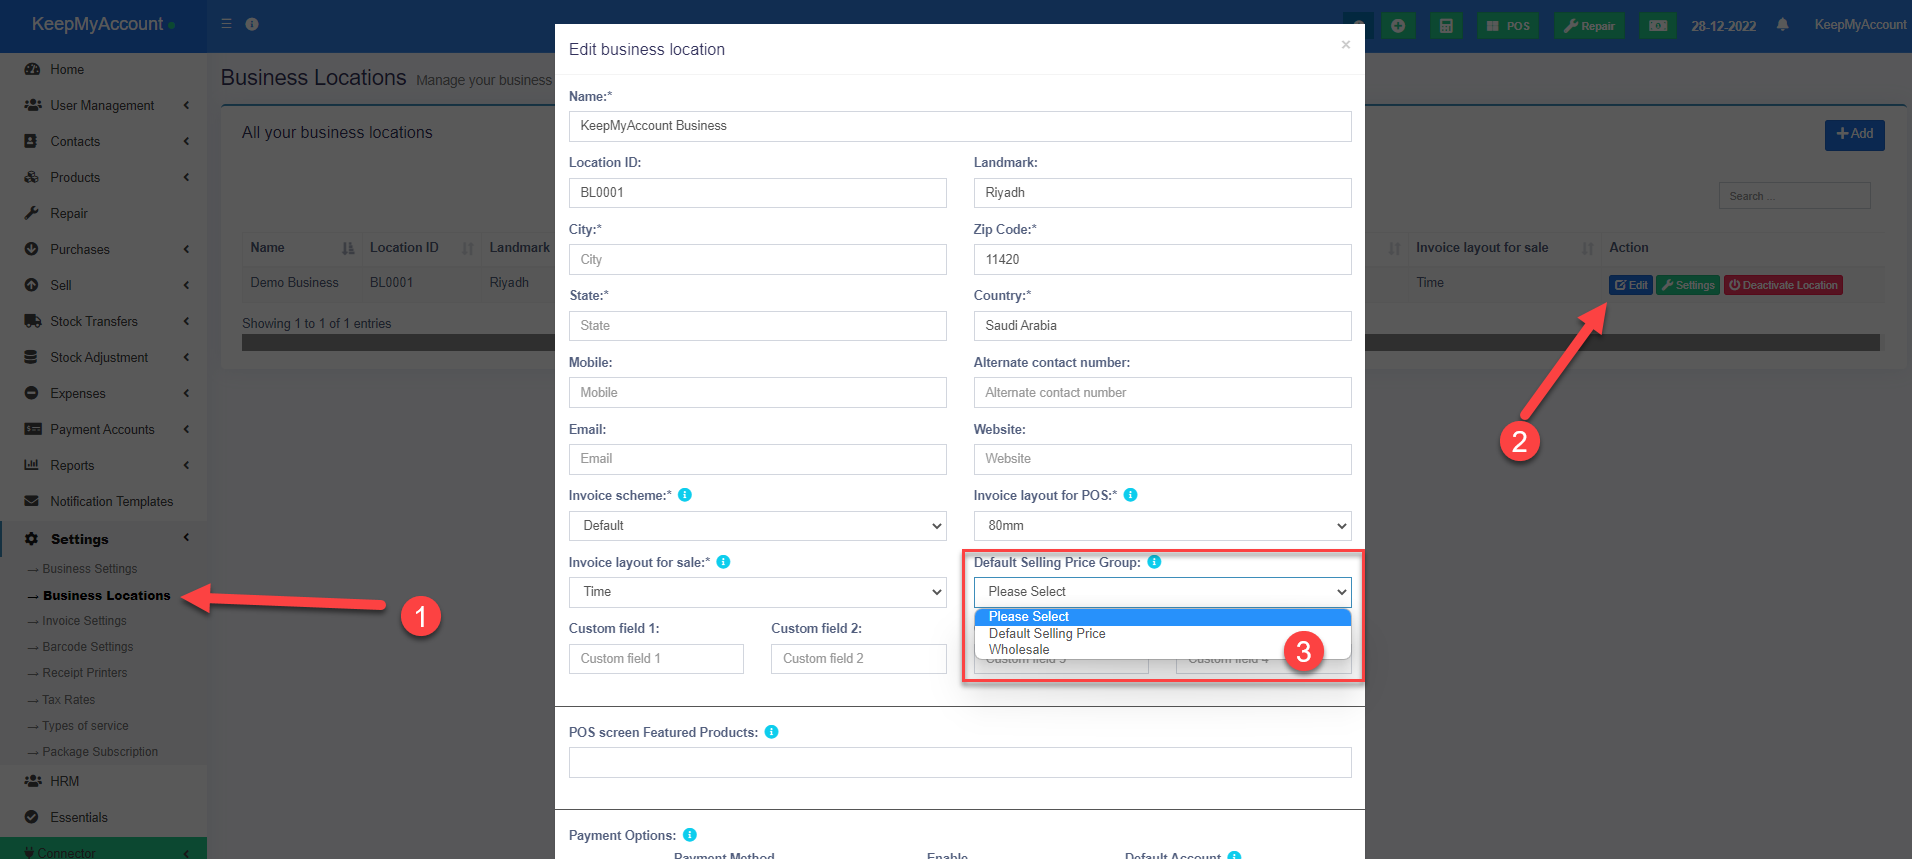
- Go to Settings –> Bussiness Locations
- Click the Bussiness Edit Option
- Select the Default Selling Price Group, if not selected then the product’s default price will be used.
FAQ? #
1. How to hide the Selling Price Group in the POS window to all cashiers #
In add/edit roles you can set which all selling price groups will be visible to that role. So in the cashier role, you can uncheck/remove permission for all other selling price groups except the one you want to show or use for the cashier.
