Add Products #
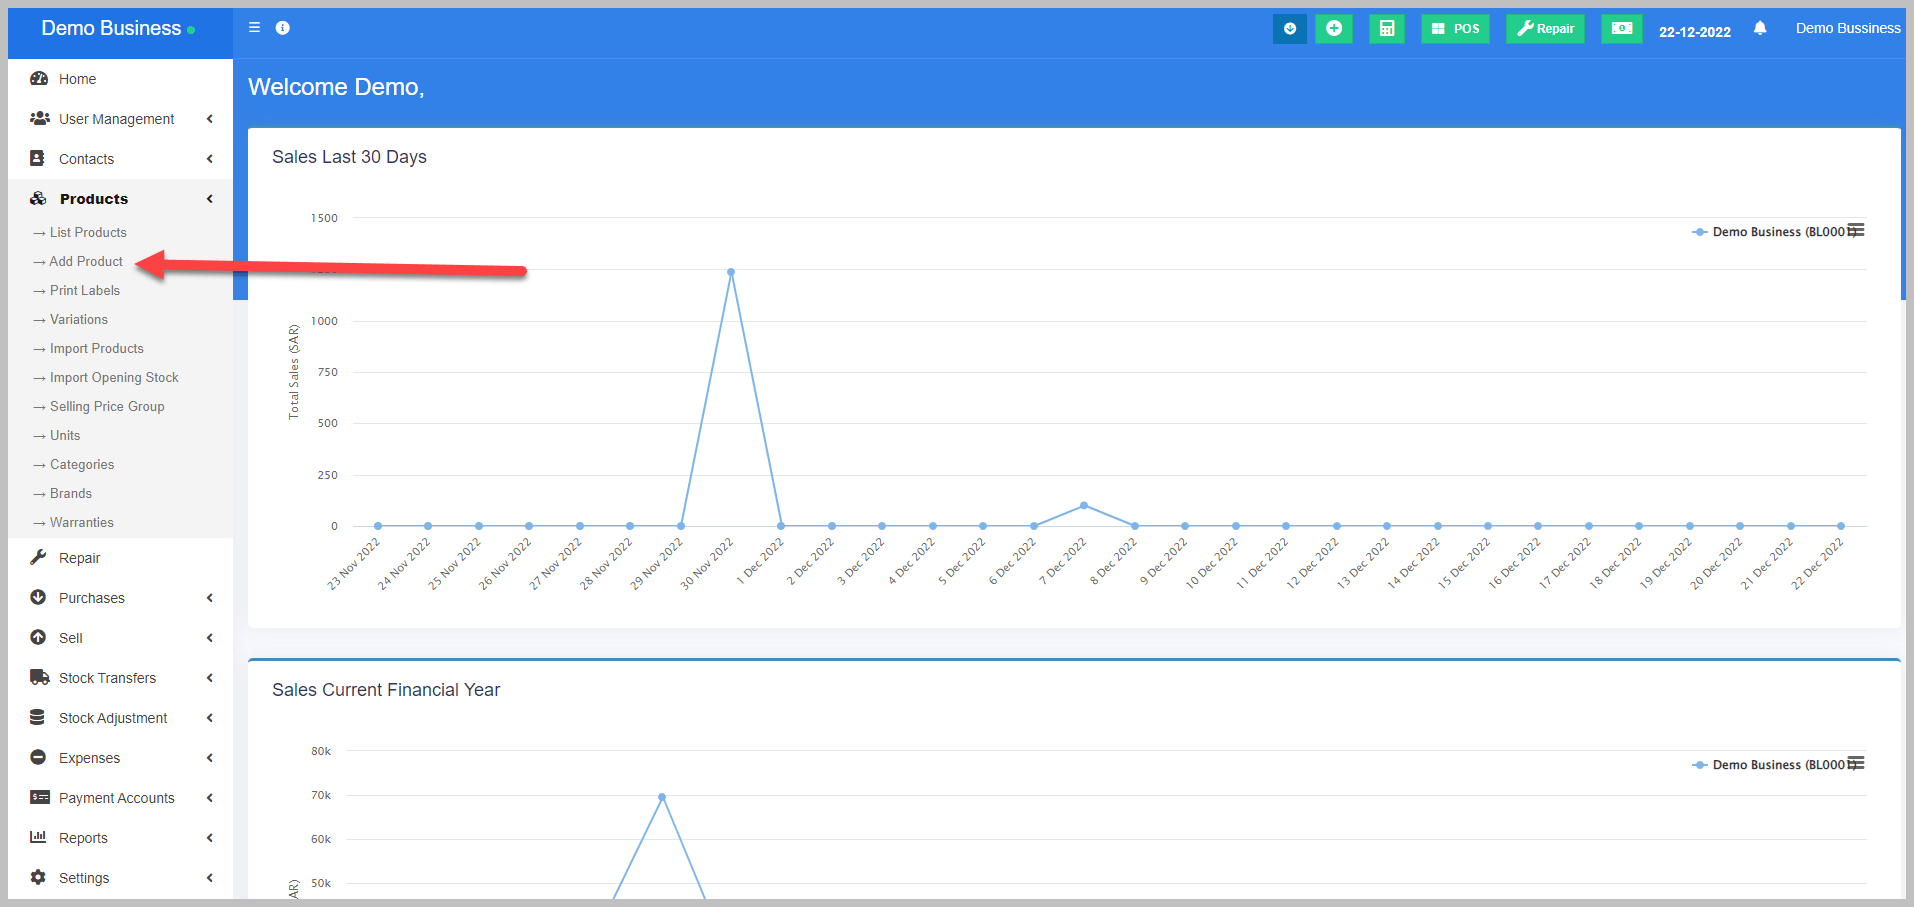
1. Go to – Products > Add Products.


To add a new product to your inventory, you need to follow these steps:
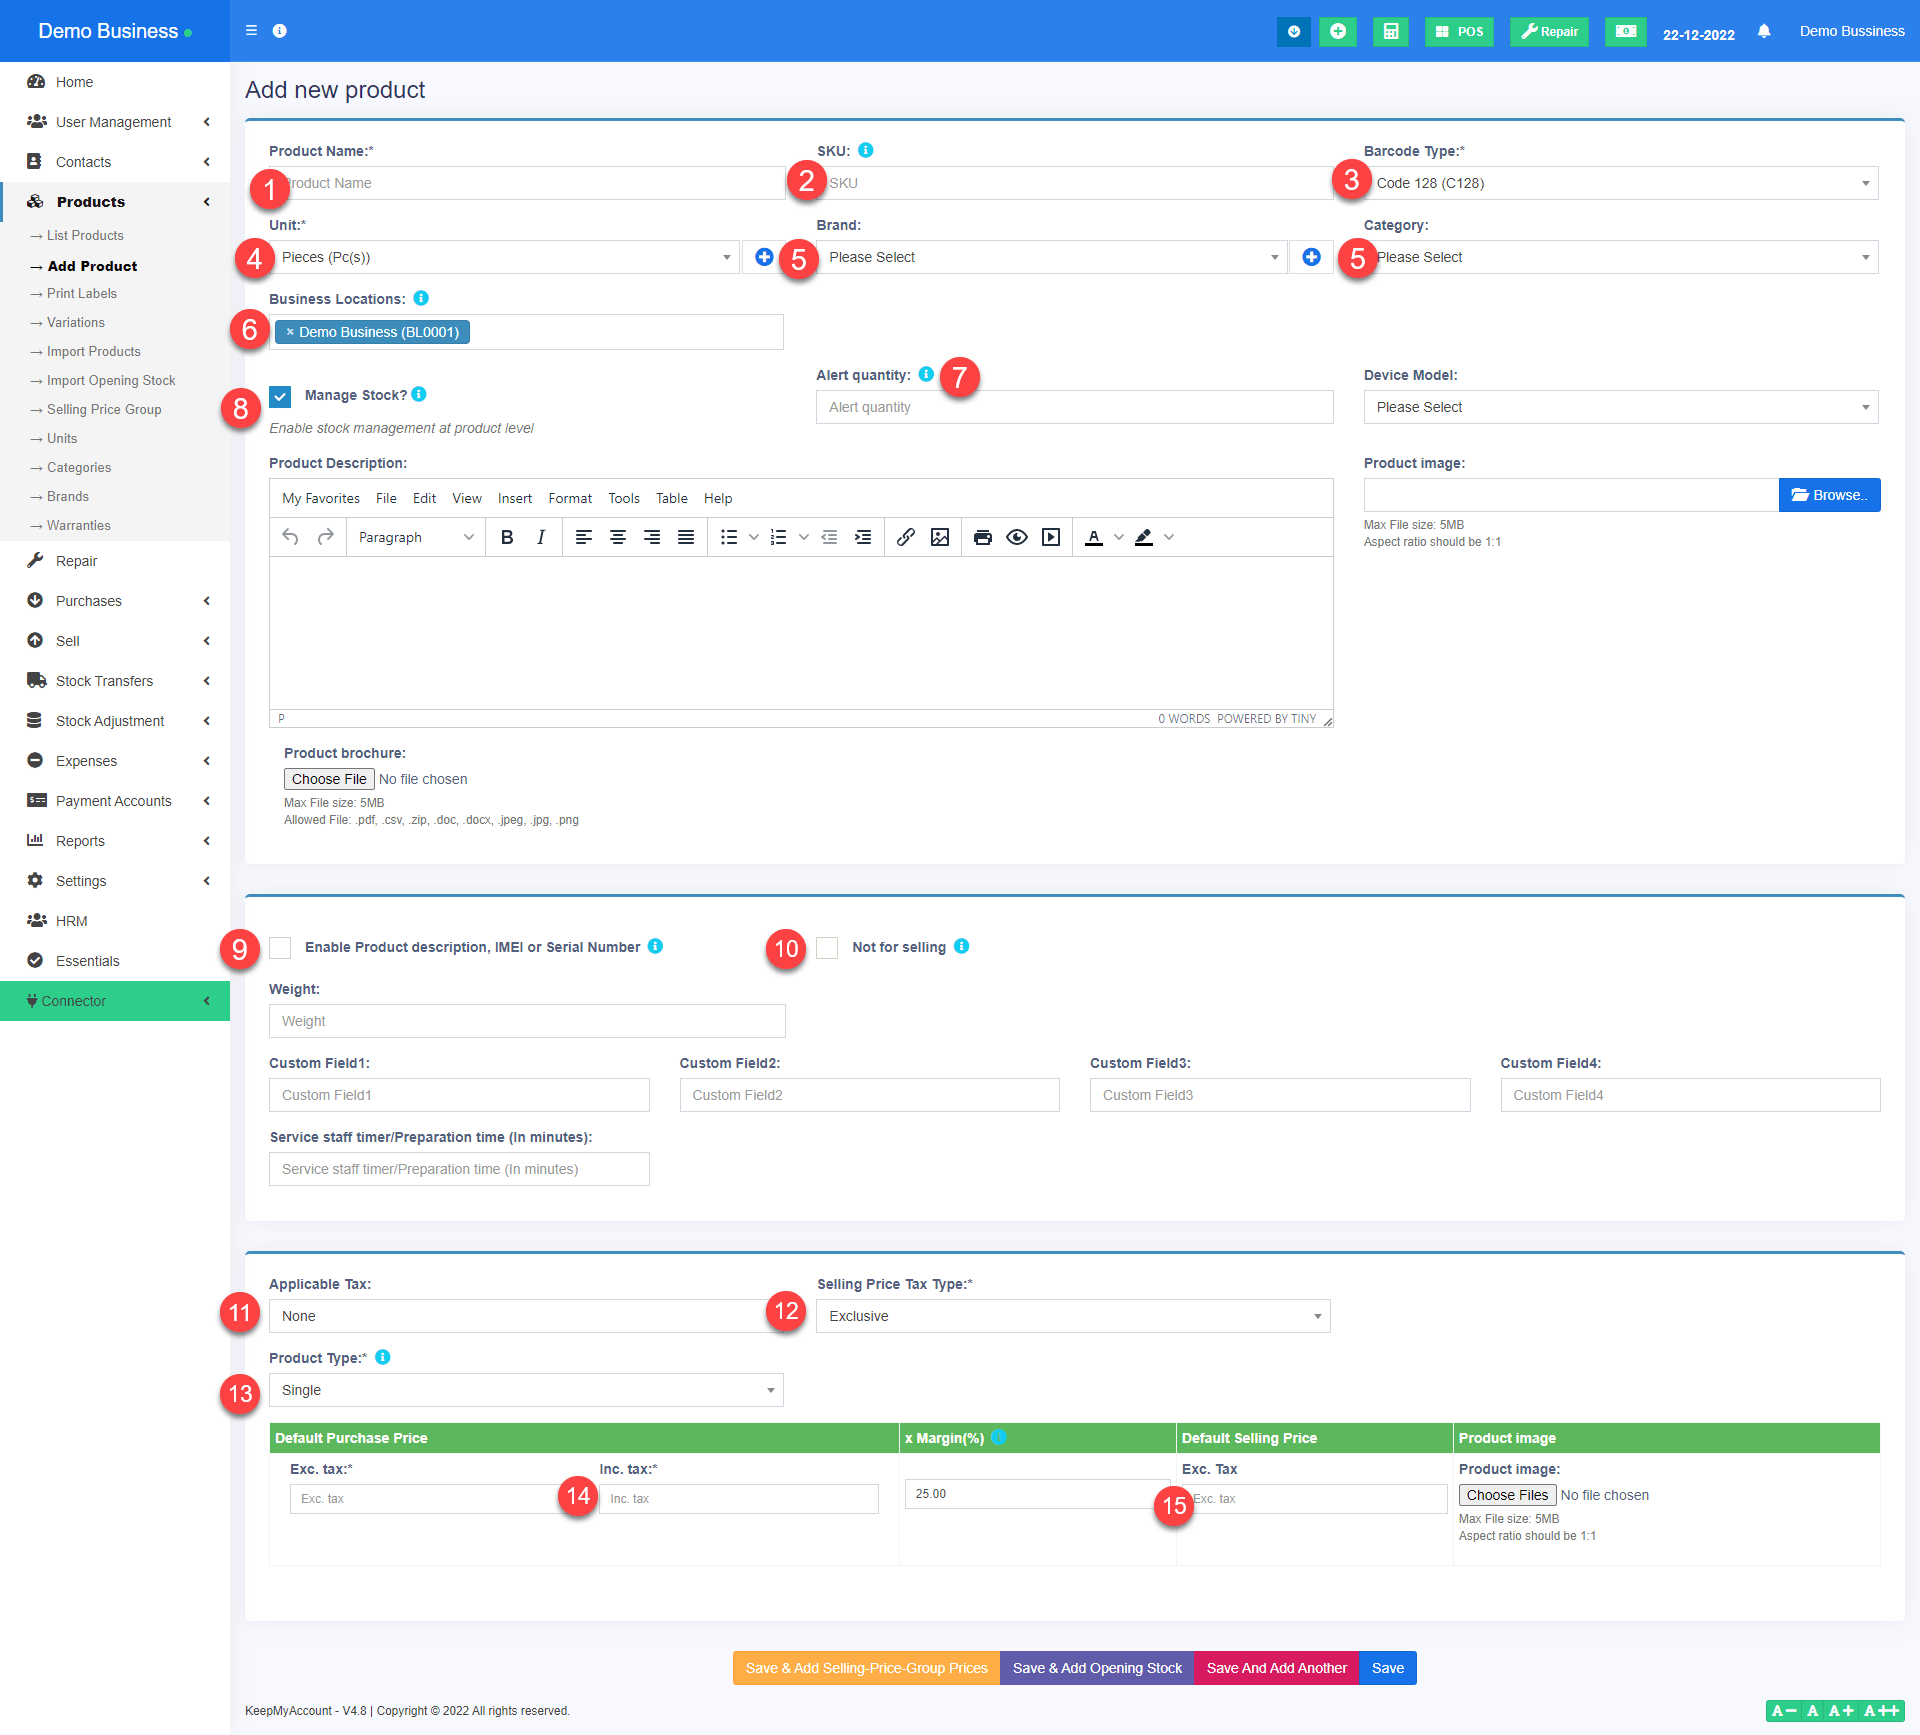
- Provide a product name that describes the product clearly and accurately. For example, “Blue Cotton T-Shirt”.
- Add a unique SKU (stock-keeping unit) which will be used to identify the product and print the barcode on labels. Leave it empty to auto-generate it. You can also add a prefix for auto-generated SKU. For example, “TS-” for t-shirts.
- Barcode type: Select a barcode type, the default/recommended is the C128 option. We recommend changing if only the product added already has an SKU number for it. For example, if you are adding a product that has an existing UPC code, you can select the UPC-A option.
- Select appropriate unit eg: pcs, nos. kg, meter, etc. This is the unit of measurement for the product. For example, if you are selling t-shirts by pieces, you can select “pcs”.
- Provide brand, units, and category sub-categories (not mandatory). These are optional fields that can help you organize your products better. For example, you can enter “Nike” as the brand, “Clothing” as the category, and “T-Shirts” as the sub-category for your product.
- Select the business location(s) where this product can sell or purchased. This is to ensure that you have enough stock of the product at each location and that you can track the sales and purchases of the product by location. For example, if you have two stores in different cities, you can select both locations for your product.
- Alert quantity: Alert quantity is used to alert when remaining stocks reach this level or below it. This is to help you avoid running out of stock and losing sales opportunities. For example, if you want to be notified when you have less than 10 pieces of t-shirts left in stock, you can enter “10” as the alert quantity.
- Manage stock: Enable/Disable stock management at a product level. Product stock management is not required for services like repairing, hair cutting, and web development printing. For items with managed stock unchecked (disabled), you can sell them in unlimited quantities. For example, if you are selling web development services, you can disable stock management for your product.
- When you sell an item, you can type the description and if this is enabled, the description will appear on the invoice, e.g. services. This is to provide more information about the product or service to your customers and to customize your invoices. For example, if you are selling web development services, you can type “Website design and development for XYZ company” as the description and enable it to show on the invoice.
- Not for selling: If a product is made not-for-selling then it will not be displayed on the POS or sales screen. This can be useful when using a manufacturing module to make the ingredients as products not-for-selling and also if you want to temporarily disable selling for some products. For example, if you are making t-shirts from cotton fabric and thread, you can make these ingredients as products not-for-selling and use them in the manufacturing module to produce t-shirts.
- Select the applicable tax for that product. Adding tax: This is to apply the correct tax rate to your product based on your location and tax rules. For example, if you are selling t-shirts in California, you can select the “Sales Tax” option and enter the tax rate as 7.25%.
- If you are selling a product with an inclusive price or an exclusive price, choose your selling pricing type: This is to determine how the tax is calculated and displayed on your invoices and receipts. For example, if you are selling t-shirts with an inclusive price of $10 (tax included), you can select the “Inclusive” option and enter $10 as the selling price. If you are selling t-shirts with an exclusive price of $10 (tax excluded), you can select the “Exclusive” option and enter $10 as the selling price.
- Select product type single or variable product: This is to specify whether your product has any variations or options that affect its price or attributes. For example, if you are selling t-shirts in different sizes and colors, you can select the “Variable” option and add each size and color as a variation with its own price and SKU. If you are selling t-shirts that have no variations or options, you can select the “Single” option and enter one price and SKU for your product.
- Enter the product purchase cost price exclude tax or include tax: This is to record how much you paid for each unit of your product when you purchased it from your supplier
How to make product image mandatory for your business #
If you are selling products online or using QR Code Module, you might want to make sure that every product has an image associated with it. This can help you showcase your products better and attract more customers. However, not every business needs to have product images for every item. Some businesses might prefer to have more flexibility and allow some products to have no images.
If you are using our platform to manage your online store, you can easily choose whether you want to make product images mandatory or optional for your products. Here is how you can do it:
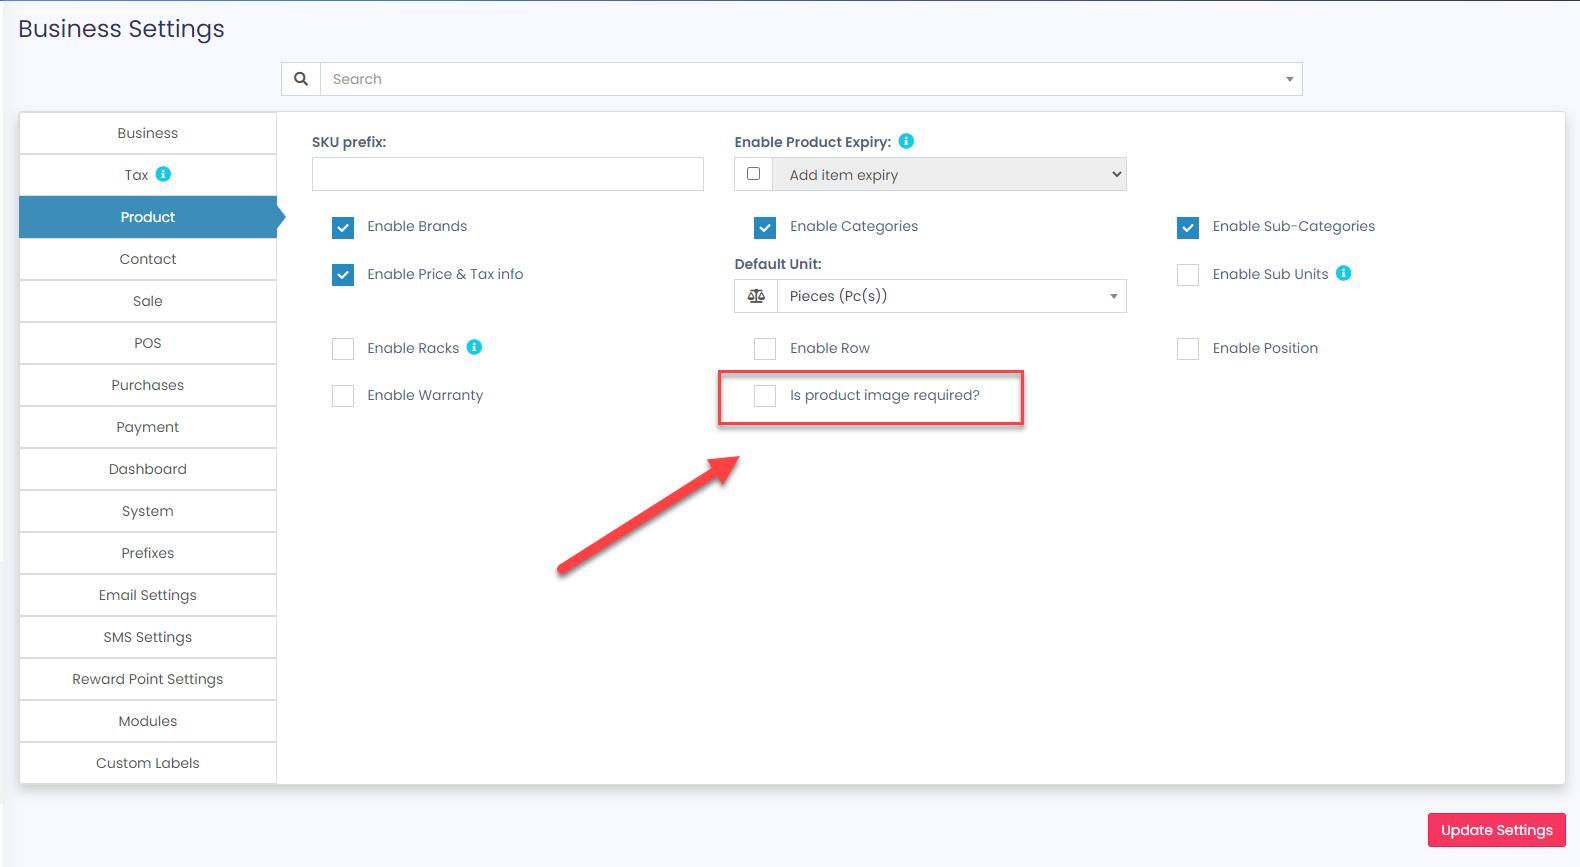
1. Go to Business Settings > Product > Make image required.
2. Tick the box next to this option to enable it. This means that you will have to upload an image for every product that you add or edit on your store.
3. If you don’t tick the box, this option will be disabled. This means that you can add or edit products without uploading an image for them.
This option is only available for businesses that need to have product images for all their products. If you don’t need this feature, you can leave it disabled and enjoy more flexibility in managing your products.


